Nieuwe pagina aangemaakt met '===Warnings=== right * The app warns for a speed camera when the camera is monitoring in the direction of travel regardless of the speed at which you drive. * The app warns for a red light camera when it is pointing in the direction of travel. * No warning is given for subsequent cameras when they are within 500m of a previous camera as the crow flies. The warning is then given for the first camera. *...'
* De [[Waze app|app]] waarschuwt voor een snelheidscamera wanneer de camera monitort in de rijrichting, ongeacht snelheid die gereden wordt.
* The [[Waze app|app]] warns for a speed camera when the camera is monitoring in the direction of travel regardless of the speed at which you drive.
* De [[Waze app|app]] waarschuwt voor een roodlichtcamera wanneer deze in de rijrichting wijst.
* The [[Waze app|app]] warns for a red light camera when it is pointing in the direction of travel.
* Er wordt geen waarschuwing gegeven voor volgende camera's wanneer deze zich hemelsbreed binnen 500m van een voorgaande camera bevinden. De waarschuwing wordt dan voor de eerste camera gegeven.
* No warning is given for subsequent cameras when they are within 500m of a previous camera as the crow flies. The warning is then given for the first camera.
Before adding a Camera to the Waze map, you should make sure that it is indeed a Camera. There are many devices that look like speed cameras or red light cameras but are not.
Cameras are displayed in the editor and can be maintained when Camera is checked in the Hazards map layer.
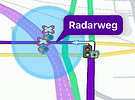
A new Camera can be added by clicking on in the top left corner of the editor and then - cameras are one of the types of Hazards - on . Select Cameras here.
Then specify the desired camera type. Waze has a whole range of them. We only use:
Speed camera - only checks for exceeding the Speed limit. The speed at which the check is made is the speed at which the driver is driving.
Red light camera - checks for driving through red lights and speeding
Dummy camera - does nothing.
Place the Camera at the desired location and specify the direction in which the camera flashes: one direction or both directions.
Place redlight camera's on the stop line. Other cameras must be placed at the location of the pole itself. The camera clicks onto the segment in question. It is not possible to monitor two segments, for example separated lanes, with one camera. In this situation, use two cameras, one for each direction of travel.
Warnings
The app warns for a speed camera when the camera is monitoring in the direction of travel regardless of the speed at which you drive.
The app warns for a red light camera when it is pointing in the direction of travel.
No warning is given for subsequent cameras when they are within 500m of a previous camera as the crow flies. The warning is then given for the first camera.
The dummy camera doesn't warn.
Opmerkingen
Flexflitsers worden ook op de kaart gezet. Voeg een kaartopmerking toe waarin je aangeeft dat het een tijdelijke flexflitspaal betreft. Een overzicht locaties Flexflitsers met PL wordt bijgehouden in Flexflitser sheet.
Soms staat ergens een Dummy camera. Deze Flitspalen worden soms op de kaart gezet om te voorkomen dat app gebruikers deze camera's rapporteren als echte Flitspalen.
Sommige Hazards geven eerder een waarschuwing dan anderen. Zo kan een waarschuwing voor een spoorwegovergang een waarschuwing voor een camera die eerder bereikt wordt overrulen.
Het is niet mogelijk om bij een camera op te geven dat deze alleen linksafslaand, rechtsafslaand danwel rechtdoorgaand verkeer flitst. De Flitspaal wordt vertoond ongeacht de te volgen route.
Traject Controle camera's (TC) worden niet als Flitspalen op de kaart gezet. Gebruik voor TC alleen de Traject controle checkboxes van de betreffende wegsegmenten.
Gebruik als locking level hetzelfde niveau als het wegsegment, met een minimum van L3.
Camera meldingen worden in het Slack kanaal #camera-bot gepubliceerd.